Installing Source Connect 3.9 on macOS 15 Sequoia
As modern voice talent, we are expected to wear many hats, sometimes including part-time engineer and tech support roles. Some of us are more comfortable with this than others, but even for those completely unfamiliar with technology, some tech wizardry can be simplified into tasks achievable by anyone with a pair of hands and a keyboard. This happens to be one such task.
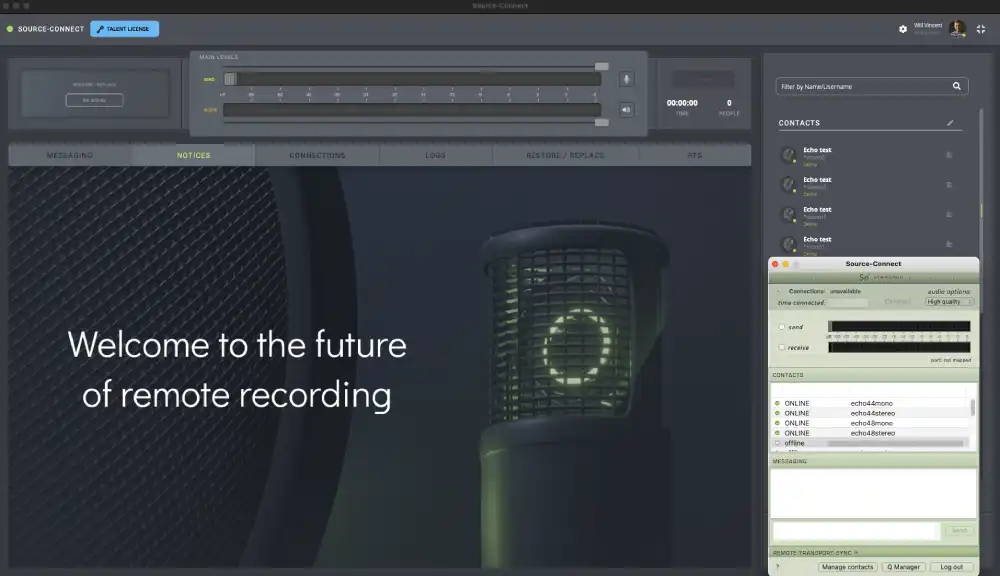
The newest version of Source Connect is here and promises to be a highly effective, less cumbersome tool for facilitating remote recording. However, it’s also a complete ground-up rewrite of the software and is incompatible with prior versions. There are both advantages and disadvantages to this.
From a software engineering perspective, shedding legacy compatibility requirements frees developers to innovate and, in theory, improve everything. From the user’s standpoint, especially early on, when adoption of the new version may be slow, you must straddle both worlds to accommodate those who haven’t yet upgraded.
As voice talent, we need to be flexible in how we connect to remote studios for recording, accommodating as many options as possible. Less friction means a smoother process. The easier it is to connect, the simpler it becomes to do the work, which, at least in a small way, makes it easier to get hired. And who doesn’t want to be hired?
The bad news, as you likely already know, having found this article, is that Source Connect 3.9 is not officially supported on newer macOS versions (as of late Q1 2025), particularly Sequoia. Installing it can be a bit of a challenge.
The good news? It’s a relatively low hurdle, and I can walk you through it step by step!
Note: Since this isn’t officially supported, the standard disclaimer applies: this is not official advice, Source Elements doesn’t endorse it, and you proceed at your own risk, blah, blah, blah. I’ve done it on my own machine, and you can do it on yours too. At the end of the day, we need to work, and this makes that possible.
Issue 1 - The Installer Is Not Signed for the Latest macOS Versions
Apple strives to protect its users by requiring developers to sign installer programs, verifying their authenticity and trustworthiness. The downside? Perfectly good, usable software that hasn’t been updated won’t be allowed to open on the operating system.
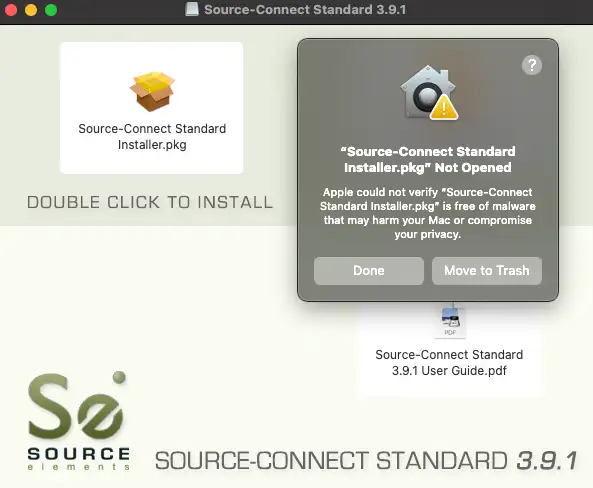
Most people get frustrated and give up here, unaware that there’s a fairly simple workaround.
Here’s how to overcome this hurdle, the only real blocker to making this work:
Step 1. Instead of double-clicking the installer .pkg file, drag it to your desktop.
Why? The disk image you downloaded, which contains the installer package, is read-only, and we need to modify a flag on the file to allow it to open. So, drag and drop it to your desktop.
Step 2. Now comes the part that intimidates some people: using the Terminal.
If you’ve never seen it before, it’s a text-based interface for your computer. It can understandably feel uncomfortable if you’re used to clicking with a mouse, but we only need to run one simple command, so your time in the Terminal will be brief.
Open the Terminal by either launching it from the Launchpad (scroll or type to find it) or pressing ⌘ Spacebar, typing terminal, and hitting Return.
A small window will appear with text something like this:
bob@Bobs-Macbook-Air ~ %
This is the command prompt, a text interface for interacting with your computer, its files, folders, and more. The ~ indicates your current folder, which is your home directory. We’re interested in the Desktop, where we dragged the installer file in the previous step.
We need to disable the quarantine flag on the file so macOS will allow it to open.
Ready? Don’t worry, you can’t mess this up.
Just type (or copy and paste) this exactly:
xattr -rd com.apple.quarantine ~/Desktop/"Source-Connect Standard Installer.pkg"
If you’ve never used the Terminal or accessed the Desktop folder this way before, you might see a warning like, “Terminal would like to access files in your Desktop folder.” Click Allow.
So, what does this do? The xattr command manipulates file attributes. Here, -rd means “delete recursively” for the specified object (our installer package), targeting the com.apple.quarantine flag. Think of it as using a key to unlock your front door so you can open it and walk inside.
Once you’ve run the command, you’re done, close the Terminal window.
Step 3. Walk inside.
We’ve unlocked the door; now we can open it. Double-click the installer. If you’re on an Intel Mac, it should “Just Work”TM. If, like me, you’re on Apple Silicon…
Issue 2 - The Application Isn’t Built for Apple Silicon
The installer and the Source Connect application it installs aren’t compiled for your computer’s processor architecture. But this isn’t a problem, Apple provides Rosetta, a compatibility layer that allows apps designed for Intel Macs to run on newer Apple Silicon M-series processors.
If you’ve previously installed anything using Rosetta, you may not see a prompt. If you haven’t, a pop-up will appear saying it needs to install Rosetta to run the application. Allow it to do so, it’ll install, then continue with the Source Connect installation.
That’s it. You’re done!
Congratulations!
You’ve now installed Source Connect 3.9 on your Sequoia-based Mac operating system!
All that’s left is to migrate your iLok key and forward ports from your router to this computer (if not already done), sign in and get to work.
There’s one minor visual bug: all quality options will display as High Quality:
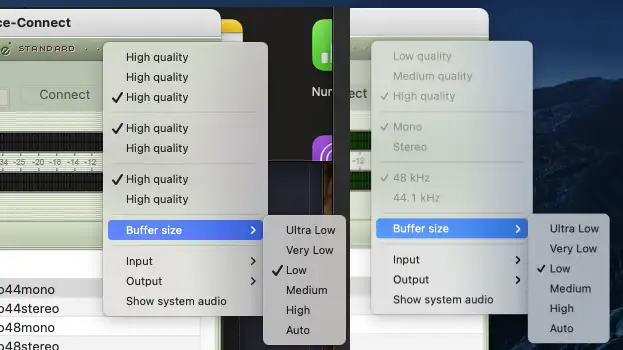
Other than that, it should work fine until the industry fully transitions to Source Connect 4.0.